Welcome to the world of seamless graphics and web design with CachyOS! In this comprehensive guide, we will walk you through the process of optimizing your Linux distribution for unparalleled performance in the creative realm.
Whether you are an experienced professional or just starting out, our step-by-step instructions will help you unlock the full potential of CachyOS and elevate your artistry to new heights.
CashyOS and GNOME: A Powerful Combination for Graphics & Web Design
While CachyOS is known to be optimized with the KDE desktop environment, many users prefer the speed and efficiency of the GNOME desktop. In this section, we will explore how using CashyOS in conjunction with the GNOME desktop can enhance your workflow for graphics and web design projects.
Trim SSD
To ensure optimal performance and longevity of your SSD, it is essential to enable the fstrim.timer service. This command can be issued in the terminal using the following syntax:
sudo systemctl enable --now fstrim.timerOptimizing Gnome Settings (optional)
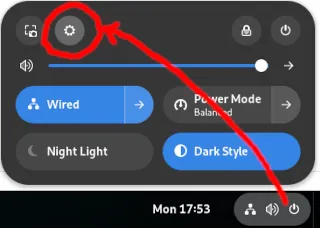
Before we dive into installing additional software, let’s first optimize your GNOME experience. To access Gnome Settings, simply click on the panel icons located in the right upper corner of your screen. This will provide you with a range of customization options to enhance your workflow for graphics and web design projects.
- Sound
To enhance your audio performance while using CashyOS, adjust the output volume slider to 100% and click on the “Test” button. If it’s too loud, lower the speaker or monitor volume as needed. - Power
Power Mode
For graphics-intensive tasks such as rendering with Blender or AI image generation, we recommend selecting the Performance profile for optimal performance. However, if you primarily use CachyOS for web design, creative writing, and general internet usage, the default Balanced setting should suffice.
Power Saving
For further customization of your power management settings, consider adjusting the Screen Blank value to 8 minutes while keeping all other values at their default settings. - Appearance
We work long hours and prefer dark mode instead of the default. - Online Accounts
We don’t set up our online accounts here and instead use the email application which we’ll cover separately. - Keyboard
If you prefer a TKL (Tenkeyless) keyboard without the number pad, we recommend customizing your GNOME settings for an optimal experience.
To do so, navigate to Keyboard > Shortcuts > View and Customize Shortcuts > Screenshots > Take a screenshot interactively and assign a shortcut that suits your preferences.
Many users find it convenient to use Ctrl + F8 as their customized shortcut for taking screenshots on TKL keyboards, which typically lack the Print Screen button found in standard keyboards. - Printers
If you have a printer connected to your CachyOS system, we recommend configuring it through the GNOME settings menu for seamless integration and functionality. To do so, navigate to Devices > Printers and click on “Add.” Follow the prompts to connect your printer and configure its settings according to your preferences.
We print at large volumes and require professional-grade printing services, so it is more cost-effective to contract a professional company that can handle such tasks at a lower cost per page compared to using a consumer printer. - Privacy & Security
System > Screen Lock
Blank Screen Delay > 8 minutes
Automatic Screen Lock > off
Leave the rest at their defaults. (← go back)
File History & Trash
CachyOS is the only operating system that preconfigures values to ideal defaults. The only adjustment we make is to lower the Automatically Delete Period to 1 day. - System
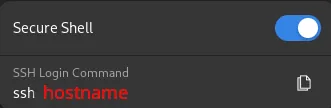
Secure Shell
Take note of the small pop-up widow. Move/click the slider to enable Secure Shell. Doing so will enable file sharing between computers. See image below:
There are other values to check out in Gnome Settings but the ones we covered above are the important ones. Feel free to check all of them and then move on.
Gnome Text
By default, CachyOS installs GEdit but we prefer the new Gnome Text editor. Since it is not installed, you can add it by using this command in the terminal:
sudo pacman -S gome-text
To open the new text editor, press the Super key (Win key) twice and select the icon to launch it.
Click the sandwich menu and select ‘Show Line Numbers.’ Then, from the same menu, choose ‘Spaces Per Tab’ and opt for option 4. Lastly, still within the menu, select ‘Text Wrapping.’
Next, click on the three-dot menu > Preferences. If you wish to customize your font, we recommend using Monospace with a size of 13 (for a 1440p monitor). Scroll down and enable both ‘Highlight Current Line’ and ‘Display Overview Map.’
The last option at the bottom, ‘Restore Session,’ should be turned off. This is important because if it’s on and you open a sensitive file, edit it, save, and close, the next person who opens the text editor will see the previously opened file. Since we handle many confidential texts, we ensure this setting remains off.
Gnome Files
Gnome files is one of my favorite applications and part of a reason why I will not use any other DE. To configure it, click on the 3 dots > Preferences.
General
Sort Folders Before files > On
Expandable Folders in List View > On
Action to Open Items > Single Click (if you are used to double clicking, keep the default).
Optional Context Menu Actions
Create Link > Off
Delete Permanently > On (careful here. If you are an experienced user, set it to on, otherwise, leave at off)
Performance
Click on Show Thumbnails and set the value to ‘All Files’. Doing so will show you a visual representation of all files, even when accessed over the network. Close the preferences window.
Time to install a few applications
This page shows a detailed description of the software we use here at Fedorum but for now, it’s important that you know how to add a browser, Gimp and TimeShift.
- TimeShift
If you chose ext4 during CachyOS installation, it is recommended to install TimeShift in order to regularly back up your system files. In case an update causes issues (which is rare but possible), you can easily restore your system to a recent snapshot using TimeShift. While CachyOS includes Snapper, this advanced tool has limited documentation. Therefore, we opt for the trusted and simple approach because we often work on tight timelines.
To install TimeShift, issue the following command in the terminal:
sudo pacman -S timeshift
The command ‘sudo pacman -S application-name‘ works for software like GIMP, Brave-bin, and many others.
Additionally, you can use CachyOS Hello > Install Apps to select the necessary tools. Remember that simplicity is key; for instance, GIMP (a 2D graphics app) meets our web design requirements. There’s no need to install additional 2D applications like Krita as we aim for a lightweight and fast machine.
Before configuring TimeShift, we need to issue two commands via the terminal:
sudo systemctl enable cronie.service
sudo systemctl start cronie.service
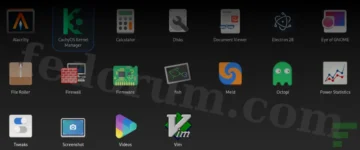
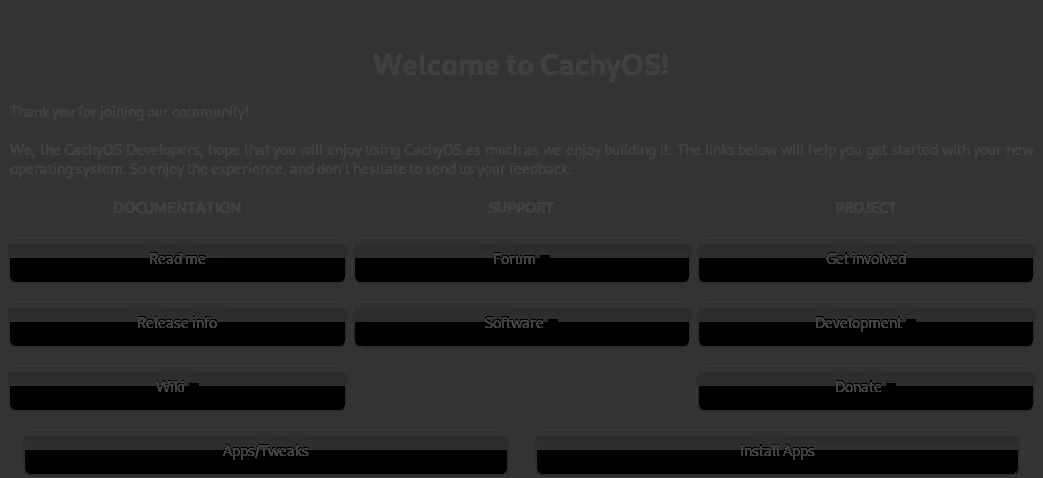
Press the Super (Windows) key twice, then choose ‘TimeShift’ from the list of Gnome applications icons. After you enter the admin password, TimeShift opens and you can start setting it up. Here are the steps:
- Type
RSYNC - Location
It’s best to select an external drive but if possible, not an USB stick. A 50 – 100 GB harddrive partition is ideal. - Schedule
We recommend keeping 1 Weekly and 3 Daily snapshots for backup purposes. This allows us to recover from issues within a 2-day window or a week, depending on when we notice the problem. Leave all other settings at their default values and click ‘OK’. Allow the computer to run for several hours or until the next day. If TimeShift successfully creates the first backup, you should see it; otherwise, please post below, and we’ll provide further assistance in setting up your daily snapshots.
It’s important to note that we didn’t immediately create a TimeShift snapshot but instead configured various settings, installed software, and only then took the snapshot. This approach ensures that if restoration becomes necessary, everything will function as expected since all changes have been incorporated.
If you didn’t select ext4 during installation, we recommend keeping your existing setup for a few days. Perform daily tasks and back up any work completed to ensure that CachyOS meets your needs. Once satisfied, perform a fresh install of the OS and choose Ext4 at the hard drive partitioning stage.
Keep an eye out for future articles detailing specialized techniques used by us, web and graphics designers, in our daily tasks. Additionally, look forward to showcasing the captivating custom banner artworks we produce for various projects.